


Andre Jute turned his Utopia Kranich into an electrified bike. In this six-part photo essay he shows you how he did it, how you can turn your own bike into a pedelec without spending a fortune, for two only hours of your time.
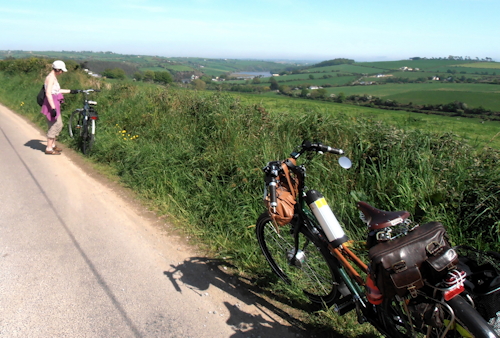
An elevation I might not reach without the motor. The motor is that discreet front hub, hardly bigger than the SON dynamo hub it replaced. The battery looks like a vacuum flask or a water bottle. This is a real sleeper of an electric bike installation.
1: ELECTRIC MOTOR CHOICES FOR A PEDELEC
2: CHOOSING YOUR KIT, AND ITS SUPPLIER
3: HOW I BUILT MY ELECTRIC BIKE IN A COUPLE OF HOURS
4: FITTING THE BATTERY AND CONTROLS
5: CAR STRENGTH LAMPS FOR 36V ELECTRIC BICYCLES
6: SETTING UP CAR STRENGTH LIGHTS ON AN ELECTRIC BIKE
Building an electric bike 1:
ELECTRIC MOTOR CHOICES FOR PEDELECS
by Andre Jute
The first thing to understand about electrifying your bike, for whatever reason and purpose, is that the battery is the most expensive, troublesome and HEAVY component of the setup. Also, note we are talking about electrical assistance, not an electric bike. They're different animals. Your bike remains a bike. You just get a little help with the steeper hills or keeping up with younger/fitter riders.
The first thing is to decide where you will put the battery, before you decide anything else, whatsoever. The whole feel of your electrified bike really hangs on where you put the battery.

Battery in the middle preserves the handling of your bike to the greatest possible extent.

Rear rack battery doesn't handle well at all... Obviously. Note the 6-bolt disk brake fittings.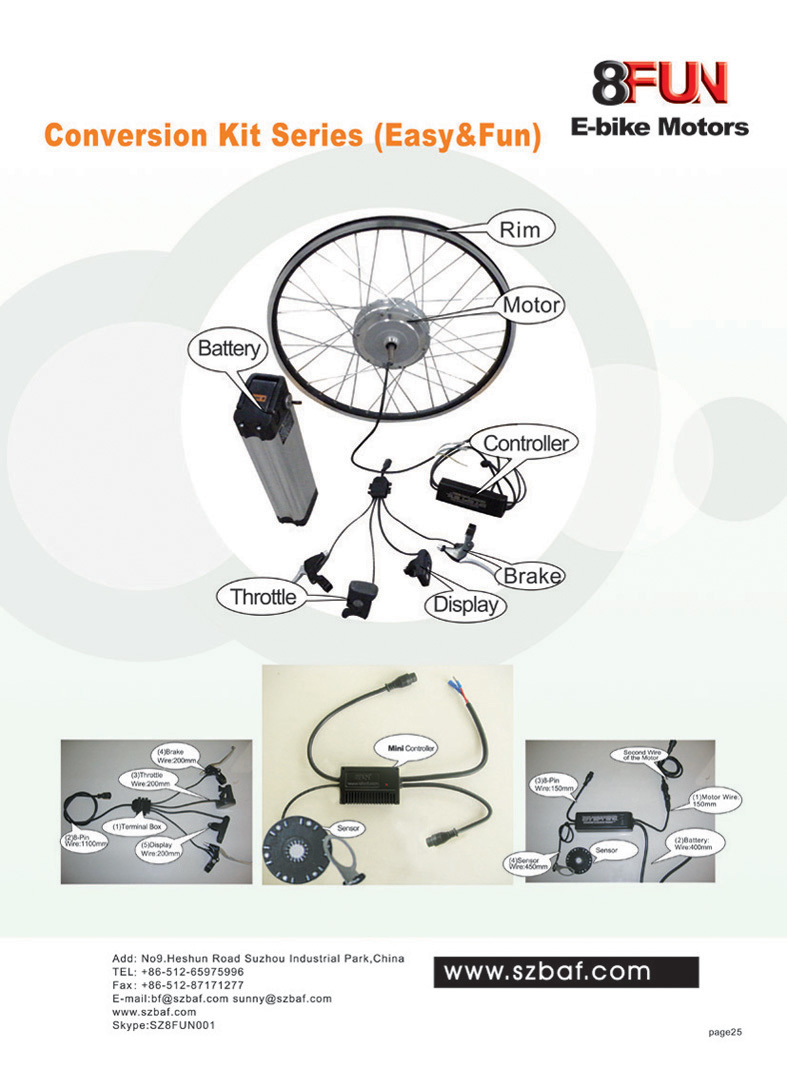
This shape of battery, intended for mounting between the seat tube and the rear mudguard, requires a specially constructed frame and is common on ready-bought pedelecs.
The next question is, do you want a front or a rear motor? Since I wasn't throwing off a Rohloff hub gearbox for derailleurs, that pretty much answered the question for me: a front motor.

You can also choose between direct drive and geared motors. The gears, exposed bottom left, whitish, in the recommended motor, the Bafang 8FUN QSWXK, are plastic and the weak point of this and virtually every other available motor if you abuse it. A metal gear is supposedly available but my understanding is that it is noisy. This motor was chosen by me and is recommended because it has the most torque of any legal pedelec motor, and because it receives special quality control for the finicky European market. (It is known affectionately in its SWXK5 form as the "Little BPM Climber". The BPM is a famous hill climbing Bafang motor, illegal as a pedelec in Europe because it is too powerful. All these SWXK motors are visibly and technically closely related to the BPM, and probably have their power output underestimated a bit to bring them within the legal barriers.) Note that the motor comes as standard with disc brake fittings, if you want to use a disc brake.

Modern motors are built to be brushless and sensorless, and as a consequence are less fragile and more maintenance-free, and thus longer-lasting, but also need much more sophisticated controllers. Pay attention to the axle diameter, top right. The recommended motor has a common bicycle diameter axle but most don't. If you choose some of the other motors, you have to file the dropouts on your fork or rear end to make them fit.
Any fork that angles in near the dropouts is probably not a suitable match to the QSWXK.
2: CHOOSING YOUR KIT, AND ITS SUPPLIER
3: HOW I BUILT MY ELECTRIC BIKE IN A COUPLE OF HOURS
4: FITTING THE BATTERY AND CONTROLS
5: CAR STRENGTH LAMPS FOR 36V ELECTRIC BICYCLES
6: SETTING UP CAR STRENGTH LIGHTS ON AN ELECTRIC BIKE
Text and original photographs copyright © 2012 Andre Jute