Andre Jute turned his Utopia Kranich into an electrified bike. In this six-part photo essay he shows you how he did it, how you can turn your own bike into a pedelec without spending a fortune, for two only hours of your time.
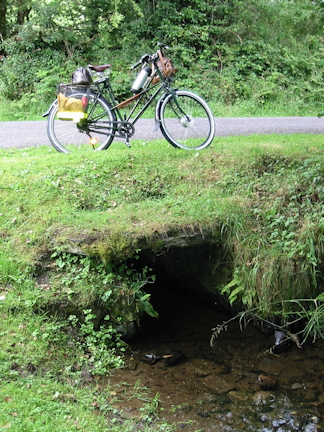
What we're working towards, a ride in the country. Hills? What hills?
1: ELECTRIC MOTOR CHOICES FOR A PEDELEC
2: CHOOSING YOUR KIT, AND ITS SUPPLIER
3: HOW I BUILT MY ELECTRIC BIKE IN A COUPLE OF HOURS
Building an Electric Bike 4:
FITTING THE BATTERY AND CONTROLS
By Andre Jute
The battery must be firmly fitted because it is heavy, and careful thought must given to fitting the controls not only for ergonomics but for the safety of the rider and others.
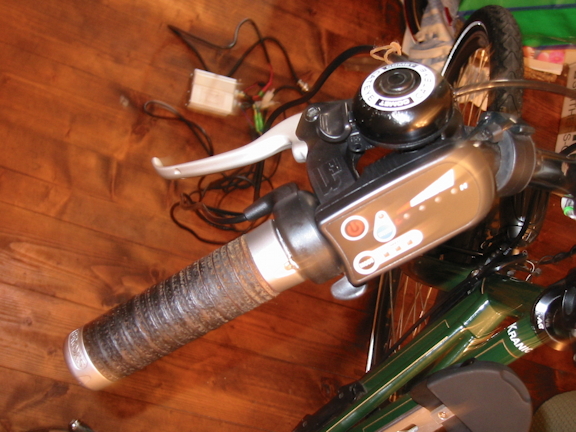
The Rohloff rotary gear control sits on the righthand side, and I have the front brake on the left, European fashion, so I put the thumb control and power switching on the left too, as an added incentive to let them go when applying the front brake! Brake levers with interruptor switches for the motor come in the kit, but I have Magura hydraulic rim brakes with which the supplied switches don’t work.
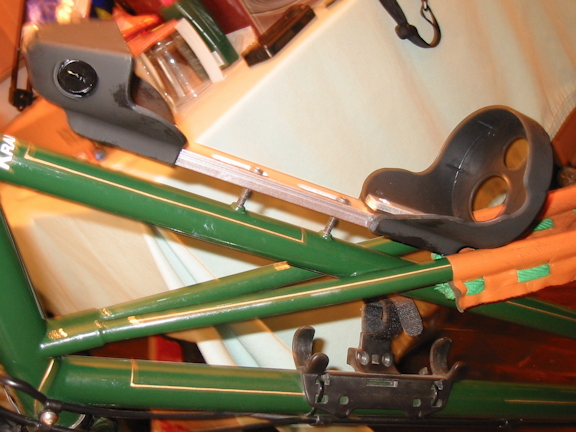
The bottle battery’s mounting cage screwed on to the bottle cage mounts on the down tube. On the crossframe of my Utopia Kranich, the battery had to be stood off the cage mounts so the cage could clear the mixte rails. Notice that the battery locks on, and can only be released with a key, a security measure. The battery also has a non-obvious master switch, and the aircraft plug's removal isn't all that obvious by touch either. All of this adds to the security of the bike and its components.
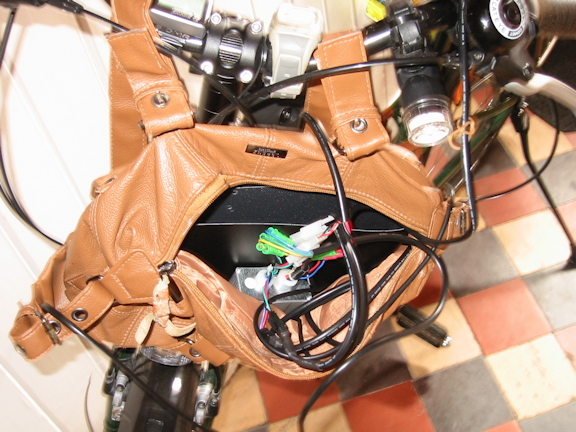
Amazingly at such a favourable price, the only place where 8FUN Bikes cut even one corner is in giving customers who buy a front drive kit a universal wiring loom, which presumes the controller box will be fitted in the battery case on the rear rack, or near the bottom bracket on the seat tube or downtube. In fact, it makes more sense to mount the controller for a front-motor bike at the front, forward of the battery or directly under it, or even on the head tube. Until I decide what to do with the excess wires, they’re just bundled into a leather saddlebag strapped to the handlebars, together with the controller box. 8FUN Bikes supplies a plastic box for tidying away the controller and excess wire, presumably to be painted in bike colour.
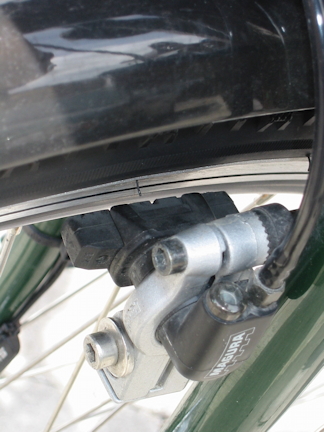
The rim on which the kit has been built is narrower than the very wide EXAL XL25 on which I run 60mm Big Apples, so the brakes had to be adjusted.

Test ride. Nothing has gone wrong in the year since.
5: CAR STRENGTH LAMPS FOR 36V ELECTRIC BICYCLES
6: SETTING UP CAR STRENGTH LIGHTS ON AN ELECTRIC BIKE
Text and original photographs copyright © 2012 Andre Jute


